67 Component Parts and a Lamp: Girls Camp at SMA
In the fall of 2011, I was appointed to provide support in the commercial and technical Vocational Training department. During this time, the department organized the Project MINT Girls Camp.
What is Girls Camp?
The Girls Camp was initiated by the Hessen Ministry of Economic Affairs and the German Federal Employment Office to provide 14 to 16-year-old girls with practical insight into qualified jobs in the fields of mathematics, computer science (“Informatik” in German), natural science and technology, in short, MINT. The objective here is to give young girls an understanding of technology in the job world. The participants learn typical work techniques in the fields of metal working, electronics and computer science.

The girls learn how to solder
For an entire week, the girls went through each area of our commercial and technical apprenticeship at SMA and built a lamp in various colors. Apprentices from various years of study and occupational groups of the commercial and technical apprenticeship supported the girls and helped them construct the lamp. My task focused more on organizing and preparing the Girls Camp. As a thank you for the support we provided, our trainers gave us the opportunity to build the lamp ourselves. I was impressed with the idea from the very start and I was also a little scared at the same time.
Sooo…what do I actually have to do?

Next step was programing
As a commercial apprentice, I did not have any experience in the field of technology. As the days drew closer for us to build the lamp, I became more and more excited. I was first assigned a spot in the workshop of our electronics engineers for equipment and systems. Now, my pulse began to soar: What did I have to do to build a lamp that was also supposed to work and where do you start? But I was immediately greeted by an apprentice and she explained to me everything we were going to do and helped me with the first steps in building my own lamp. 🙂
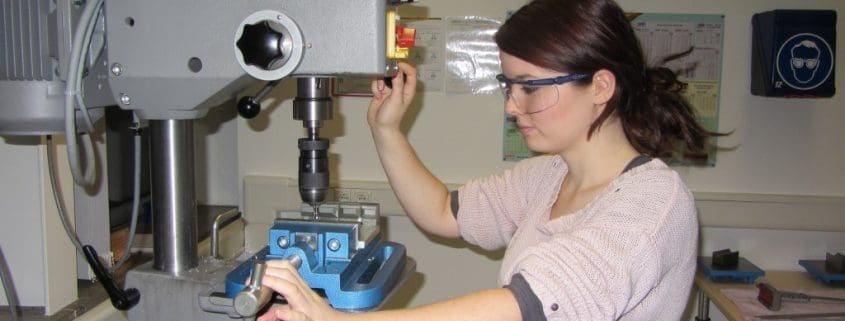
From Very Small Parts to Gigantic Machines…

Then the lamp put together
So I immediately started cutting a printed circuit board in the right size and drilled the first holes. After a brief set of instructions, I began soldering the individual component parts onto the printed circuit board. The parts indeed were really small and required quite the delicate touch. On the second day, it was time to build the enclosure for the lamp. I also received a great deal of support and I learned how to drill metal, deburr the corners and then my lamp shade took on this wonderful arched shape. We were also given a brief introduction into programming. I was now ready to solder the last parts on my printed circuit board, attach my LED lamp to the lamp shade and start assembling the lamp.
Turning up the voltage

Finally it shines
Then came the most exciting part, would my lamp actually work? (The whole time I was not yet really convinced 😀 ) But it lit up and not just in plain white, but in different colors. 🙂 I was naturally really proud. In the end, I can say that is was a great experience, I learned a lot (but only a fraction of what the individual professional groups actually do), and I have a lamp that I built myself, which will be given a very special place in my room. 🙂
Feel free to contribute!